Wet felting is a fascinating and versatile craft that transforms wool fibers into a dense, durable fabric.
This ancient technique involves the use of warm water, soap, and agitation to create a myriad of items, including felted art projects specifically designed for kids.
Whether you’re a beginner or an experienced crafter, wet felting offers a fun project for everyone.
In this article, we’ll explore what you can make with wet felting, providing tips and tricks to help you get started.
Key Takeaways:
- Discover the endless possibilities of crafting with wet felting, from home decor to wearable art.
- Learn the wet felting basics and techniques to start your own felting projects.
- Explore resources like felting tutorials and online felting school classes to enhance your skills.
Introduction to Wet Felting
Wet felting is an ancient craft that has been around for thousands of years, with evidence of felted textiles dating back to the Neolithic period. This fascinating process involves matting, condensing, and pressing wool fibers together using heat, moisture, and pressure to create a dense, thick fabric. Over the centuries, wet felting has been used to create a wide range of items, from clothing and accessories to home decor and decorative pieces.
One of the most appealing aspects of wet felting is its accessibility. It’s a fun and creative process that can be enjoyed by people of all ages and skill levels. With the right supplies and a bit of patience, anyone can create beautiful and unique wet felted projects. Whether you’re a seasoned crafter or just starting out, wet felting is a fantastic way to express your creativity and produce something truly special.
The Basics of Wet Felting
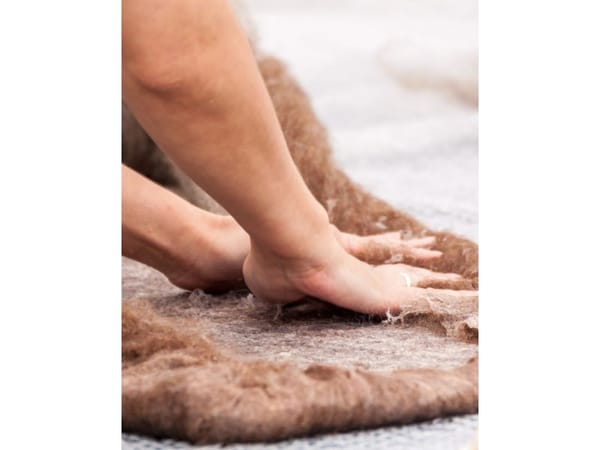
Before diving into the various wet felting ideas you can undertake, it's essential to understand the wet felting process. The basics involve laying out wool fibers in layers, adding warm soapy water, and then applying pressure through rolling and rubbing.
The combination of heat, moisture, and agitation causes the fibers to lock together, resulting in a fully felted fabric.
What is Wet Felting?
Wet felting is a process that involves applying friction, heat, and water to a mass of loose fleece fibers or roving. The fibers are worked into a pattern or design to create a 2D or 3D piece of work. This technique allows for a wide range of textures and patterns, from smooth and flat to thick and dimensional.
The wet felting process involves several key steps. First, you prepare the materials by laying out the wool fibers in layers. Next, you add warm water and soap to the fibers, which helps them mat and condense together. Then, you apply friction and heat by rubbing, rolling, and pressing the fibers. This agitation causes the fibers to interlock and form a dense fabric. The type of wool used can also affect the final product, with different types of wool producing different textures and colors.
One of the unique characteristics of wet felting is its ability to be worked and manipulated to become as dense as wood. This makes it a versatile material that can be used to create a wide range of projects, from decorative items to functional pieces like bags and clothing.
Supplies Needed
To get started with wet felting, you’ll need a few essential supplies. These include:
- Fleece fibers or roving: This is the raw material used to create the felt. You can use different types of wool, such as merino, Shetland, or Romney, each offering unique textures and colors.
- Water: Water is crucial in the felting process as it helps the fibers mat and condense together.
- Soap or felting needle: Soap, such as liquid soap or dish soap, is used to help the fibers felt together. A felting needle is a specialized tool used to shape and manipulate the fibers.
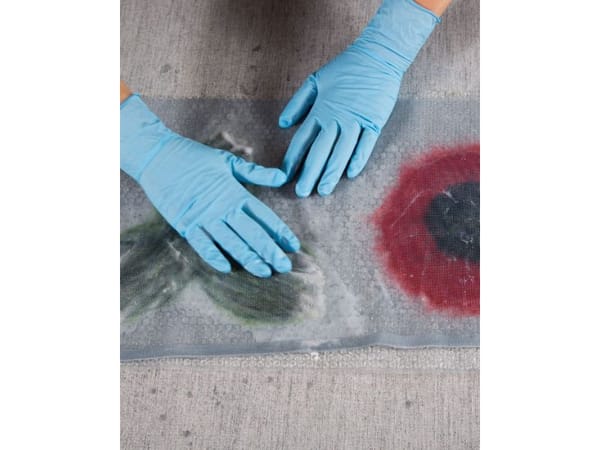
- Foam or felting mat: A foam or felting mat provides a surface for the fibers to felt on. Bubble wrap can also be used as an alternative.
- Measuring cups or containers: These are used to measure out the right amount of water and soap.
- Rolling pin: A rolling pin can be used to help shape and manipulate the fibers.
- Other materials: Depending on the project, you may need additional materials like scissors, needles, and thread.
With these basic supplies, you can start creating your own unique wet felted projects. Whether you’re making decorative items, functional pieces, or just experimenting with the process, wet felting is a fun and creative way to express yourself.
Crafting with Wet Felting Techniques
Techniques vary depending on the project. The same process can be applied to various felt-related projects, such as felted scarves and children’s felted crafts. For larger projects, you may need to roll your work in a towel or bubble wrap, applying even pressure to ensure an even felt. Smaller items might only require gentle rubbing and pulling to achieve the desired shape.
Regardless of the size, the key is to rinse your work thoroughly in cold water to remove any soap residue.
Wet Felting Ideas

Create Stunning Home Decor
Wool decor items are a popular choice for wet felting enthusiasts. Wet felted flowers are a delightful project that can add a touch of floral art to your home decor. A felted bowl can add a touch of handmade elegance to any room, while wet felted pods can serve as unique containers or decorative pieces. With the right pattern and color choices, you can create pieces that complement your home’s aesthetic, as well as make wool pieces to complement your holiday decor (think pillows, table runners, ornaments, and so much more).

Fashioning Wearable Art
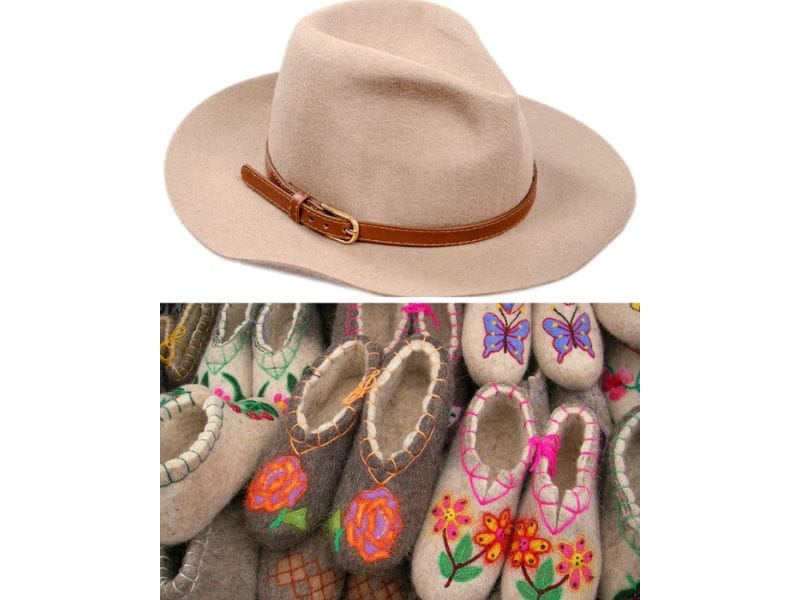
Wet felting isn't just for home decor; it's also perfect for creating wearable art. Felted scarves and wet felted slippers are not only stylish but also incredibly warm and soft. With the ability to customize colors and patterns, you can craft one-of-a-kind pieces that showcase your personal style.
Exploring the Versatility of Pre-Felt in Wet Felting
Pre-felt is a fantastic material that serves as a versatile base for many wet-felt projects.
It's essentially partially felted wool that can be further shaped and bonded using wet felt techniques.
By starting with pre-felt, crafters can save time and ensure a more uniform thickness across their creations. Whether you're aiming to make a delicate felted scarf or a sturdy wet felted pod, pre-felt provides a consistent foundation that can be built upon with additional fibers and embellishments. Its malleable nature allows for easy shaping and layering, making it a popular choice for both beginners and experienced felters.
Incorporating pre-felt into your wet-felt projects opens up a world of creative possibilities.

For instance, when creating a felted hat, pre-felt can be cut to the desired shape and then further wet felted to achieve a snug and comfortable fit. The ability to rub and pull the fibers into shape, and then roll them to bond, gives the felter control over the final texture and firmness of the hat. Pre-felt can also be dyed in various colors before felting, allowing for intricate designs and patterns to be planned out in advance. A tutorial on using pre-felt can guide newcomers through the process, ensuring a successful and enjoyable crafting experience.
Wet Felting for Cozy Accessories
Felting projects aren’t just for creating flat pieces of fabric; it’s a versatile craft that can be used to make a variety of cozy accessories. Fun ideas for using felted wool balls can make the crafting experience more enjoyable and interactive for kids. Imagine wrapping yourself in a scarf made from the softest merino wool, crafted by your own hands.
The process for most wet felt projects involves laying out your first layer of wool fibers in the same direction, then laying your second layer in the opposite (perpendicular) direction to the first. Sometimes a crisscross pattern is used to form a layer, adding soap and water, and then gently massaging and rolling the material. The fibers interlock, and as you roll and apply pressure, they fuse together to create a durable yet flexible fabric perfect for scarves, hats, and mittens.

Creating these accessories is not only rewarding but also allows for a high degree of customization.
You can choose the colors and patterns that suit your style, or even needle felt designs onto your wet felted base for added flair.
The combination of wet and needle felting techniques can result in intricate patterns and textures, making each piece a unique work of art.
Whether you're crafting a cozy beanie or a chic pair of fingerless gloves, wet felting offers endless possibilities to keep you warm and stylish.
Enhancing Textures with Layering in Wet Felting
Layering is a fundamental technique in wet felt that can significantly enhance the texture and thickness of your felted projects.
By carefully arranging multiple layers of wool roving, you can control the density and strength of the final piece.
This is particularly useful when creating items that require a bit more rigidity, such as bags, slippers, or even sculptural art pieces. The key is to alternate the direction of the fibers with each new layer, which ensures an even and cohesive felt.
Moreover, the beauty of layering comes alive when you start experimenting with different types of wool and combining colors. You can create gradients, patterns, or even pictorial designs within your felted fabric.

Once you've laid out your desired layers, the rolling process helps to bind them together, creating a seamless piece of fabric with rich texture and depth. Whether you're a seasoned felter or a curious beginner, mastering the art of layering will open up a world of creative potential in your wet-felt projects.
Needle Felting as a Complementary Technique to Wet Felting
Needle felting is a dry felting method that can be used in conjunction with wet felting to add intricate details and texture to your projects.
While wet felt projects are great for creating larger, more uniform pieces, needle felting allows for the precise placement of fibers to create detailed patterns and embellishments.

For example, after crafting a basic wet felted dress, a crafter can needle felt onto the fabric to add floral designs or other decorative elements, giving the garment a unique and personalized touch. The needle felting technique involves using a barbed needle to interlock the wool fibers, which can be done on a flat surface or directly onto a three-dimensional wet felted form. Needle felting can also be used to fix or smooth out areas on wet-felted projects.
Combining these two felting methods can elevate your projects to a new level of artistry.
Take a felted scarf, for instance; once the base scarf is created through wet felting, needle felting can be used to add vibrant, textured accents that stand out against the smooth background. This hybrid approach not only enhances the visual appeal of the scarf but also adds a tactile dimension that can't be achieved with wet felting alone.

For those looking to expand their felting skills, a tutorial that integrates both wet and needle felting techniques can be an invaluable resource, providing step-by-step guidance on how to harmoniously blend these two distinct felting styles.
Felting Tutorials and Online Learning
For those looking to refine their skills, numerous felting tutorials are available on platforms like YouTube. Additionally, an online felting school can provide structured lessons and guidance for beginners and advanced crafters alike. These resources are invaluable for learning new techniques and finding inspiration for your next project.
Crafting Felted Flowers and Decorations
Wet felt flowers are a delightful way to decorate your space or embellish other crafts. By manipulating the wool fibers into the shape of petals and leaves, you can create realistic or fantastical blooms. These can be used to adorn hats, bags, or even as standalone art pieces.
Making Functional Items
Beyond decorative objects, wet felting can be used to make functional items. Crafting a durable fabric through wet felting techniques allows you to create items like coasters, placemats, and even laptop sleeves. The natural insulating properties of wool make these items both practical and attractive.
Tips for Successful Wet Felting
Successful wet felting requires patience and attention to detail. Always start with a pre-felt to ensure a consistent base, and don't be afraid to dip your work back into hot water to help the fibers mesh together. Remember to apply even pressure to your wet felt and to rinse your work thoroughly to avoid any soap buildup.
Tricks for Beginners
If you're new to wet felting, start with simple projects like felted balls or small decorations. These will give you a feel for the felting process without being overwhelming. As you gain confidence, you can move on to more complex shapes and larger projects.
Wrapping Up
Wet felting is a craft that offers endless possibilities for creativity.
From decorative items to wearable art, the projects you can create are limited only by your imagination.
By mastering the wet felting basics and techniques, you can embark on a crafting journey that is both rewarding and enjoyable.
With the help of online resources and tutorials, even beginners can produce stunning felted items.

Q: Is wet felting suitable for beginners?
A: Absolutely! Wet felting is a great craft for beginners. Start with small, simple projects to get a feel for the process, and utilize online tutorials and felting schools for guidance.
Q: Can I make clothing with wet felting?
A: Yes, you can create clothing items such as dresses, scarves, jackets, skirts, and slippers with wet felting. The wet felt technique allows for a lot of creativity in terms of shape, color, and design.
Q: How do I care for my wet-felted items?
A: Care for wet felted items by gently hand washing them in cold water with a mild detergent. Avoid wringing or twisting and lay flat to dry to maintain their shape.


Images Source: Canva

